-
Three.js module 활용 - (3) Geometry 마무리Three.js 2022. 9. 26. 16:44
[이전 글]
Three.js module 활용 - (2) Geometry
[이전 글] https://chaeng03.tistory.com/13 Three.js module 활용 - (1) Basic [이전 글] https://chaeng03.tistory.com/12 Three.js 입문기 해당 게시글은 2022.05.11에 깃허브로 작성되었습니다. 여느때와 같..
chaeng03.tistory.com
해당 게시글은 2022.05.11에 깃허브로 작성되었으며
아래 유튜브 강의 영상을 수강하며 공부한 내용을 기재했습니다.
1. ShapeGeometry
ShapeGeometry는 생성 시 Shape CLASS의 객체를 인자로 받는다.
Shape은 2차원의 도형을 정의하기 위한 CLASS 이다.
(1)
ShapeCLASS기존 02_basic.js 파일 중 _setupModel 함수 부분을 주석 처리하고 다음과 같이 작성한다.
// 02_basic.js
_setupModel() {
  const shape = new THREE.Shape();

  const geometry = new THREE.BufferGeometry();
  const points = shape.getPoints();
  geometry.setFromPoints(points);

  const material = new THREE.LineBasicMaterial({color: 0xffff00});
  const line = new THREE.Line(geometry, material);

  this._scene.add(line);
}
위 코드를 작성하고 화면을 보면 아무것도 뜨지 않을텐데
현재 Shape CLASS를 생성하고 이 CLASS의 모양에 대한 정의를 하지 않았기 때문이다.
Shape CLASS를 정의한 부분 아래에 다음과 같은 코드를 추가하자.
shape.moveTo(1, 1);
shape.lineTo(1, -1);
shape.lineTo(-1, -1);
shape.lineTo(-1, 1);
shape.closePath();
(x, y) 좌표를 사용해 도형의 모양을 정의했는데 화면을 보면 다음과 같이 평면의 정사각형 선이 보일 것이다.

이번에는 좀 더 복잡한 모양의 도형을 정의해보자.
위에서 정의한 부분을 주석처리하고 다음과 같이 작성하자.
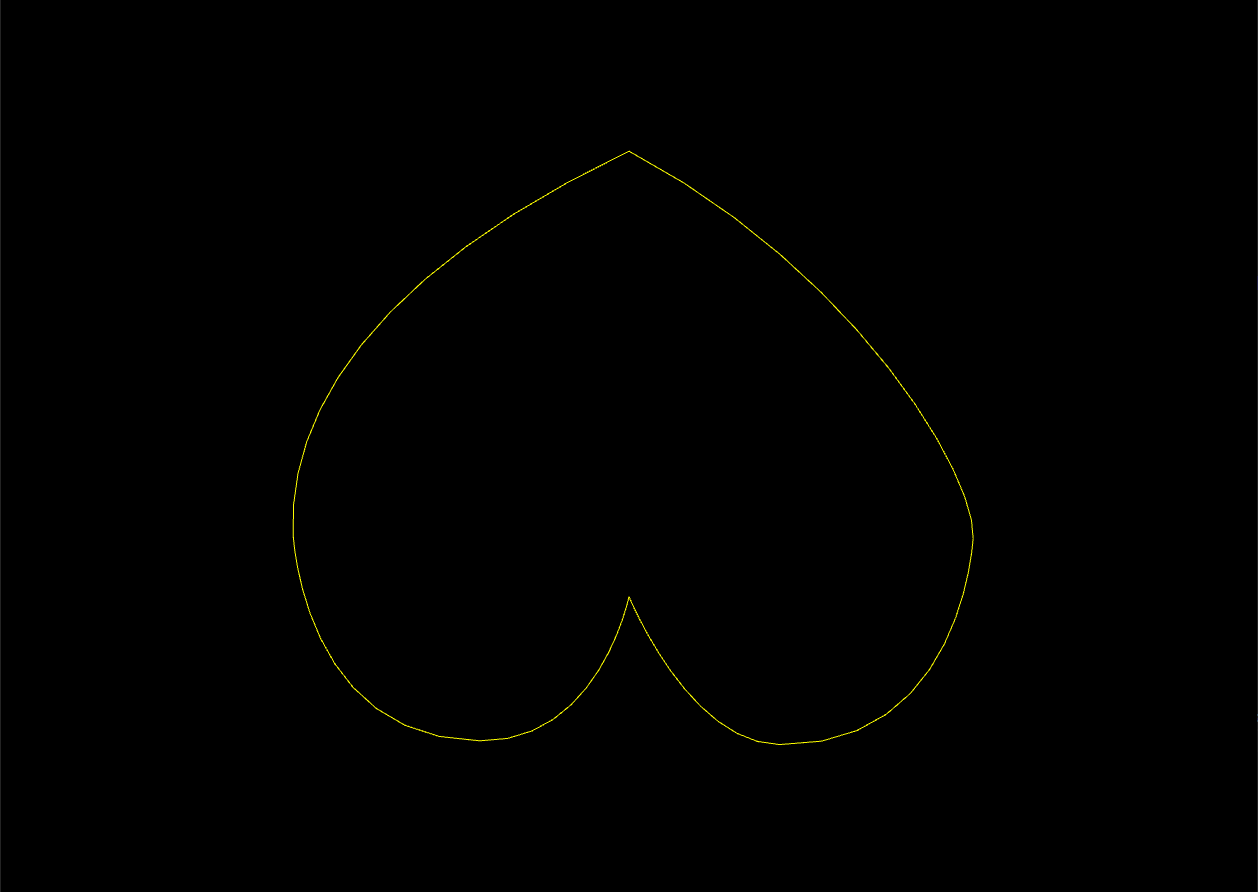
const x = -2.5, y = -5;
shape.moveTo(x + 2.5, y + 2.5);
shape.bezierCurveTo(x + 2.5, y + 2.5, x + 2, y, x, y);
shape.bezierCurveTo(x - 3, y, x - 3, y + 3.5, x - 3, y + 3.5);
shape.bezierCurveTo(x - 3, y + 5.5, x - 1.5, y + 7.7, x + 2.5, y + 9.5);
shape.bezierCurveTo(x + 6, y + 7.7, x + 8, y + 4.5, x + 8, y + 3.5);
shape.bezierCurveTo(x + 8, y + 3.5, x + 8, y, x + 5, y);
shape.bezierCurveTo(x + 3.5, y, x + 2.5, y + 2.5, x + 2.5, y + 2.5);
위 코드를 작성하고 화면을 보면 아무것도 안 보이는데 도형의 크기가 너무 커서 화면 밖을 벗어났기 때문이다.
마우스 휠로 화면을 축소하고 보면 하트를 그렸다는 것을 알 수 있다.
Shape CLASS에 대해 파악했으므로 다시 ShapeGeometry에 대해 알아보자.
(2) ShapeGeometry
새롭게 정의했던 _setupModel 함수를 주석처리하고 이전에 주석처리했던 기존 setupModel 함수의 주석을 해제하자.
그 후, Geometry를 정의했던 코드를 주석 처리하고 다음과 같이 작성하자.
_setupModel() {
  const shape = new THREE.Shape();

  const x = -2.5, y = -5;
  shape.moveTo(x + 2.5, y + 2.5);
  shape.bezierCurveTo(x + 2.5, y + 2.5, x + 2, y, x, y);
  shape.bezierCurveTo(x - 3, y, x - 3, y + 3.5, x - 3, y + 3.5);
  shape.bezierCurveTo(x - 3, y + 5.5, x - 1.5, y + 7.7, x + 2.5, y + 9.5);
  shape.bezierCurveTo(x + 6, y + 7.7, x + 8, y + 4.5, x + 8, y + 3.5);
  shape.bezierCurveTo(x + 8, y + 3.5, x + 8, y, x + 5, y);
  shape.bezierCurveTo(x + 3.5, y, x + 2.5, y + 2.5, x + 2.5, y + 2.5);

  const geometry = new THREE.ShapeGeometry(shape);

  const fillMaterial = new THREE.MeshPhongMaterial({color: 0x515151});
  const cube = new THREE.Mesh(geometry, fillMaterial);

  const lineMaterial = new THREE.LineBasicMaterial({color: 0xffff00});
  const line = new THREE.LineSegments(
  new THREE.WireframeGeometry(geometry), lineMaterial);

  const group = new THREE.Group()
  group.add(cube);
  group.add(line);

  this._scene.add(group);
  this._cube = group;
}
그럼 우리가 전에 정의했던대로 gray 색상의 면과 yellow 색상의 선을 갖고 있는 하트가 생성된다.
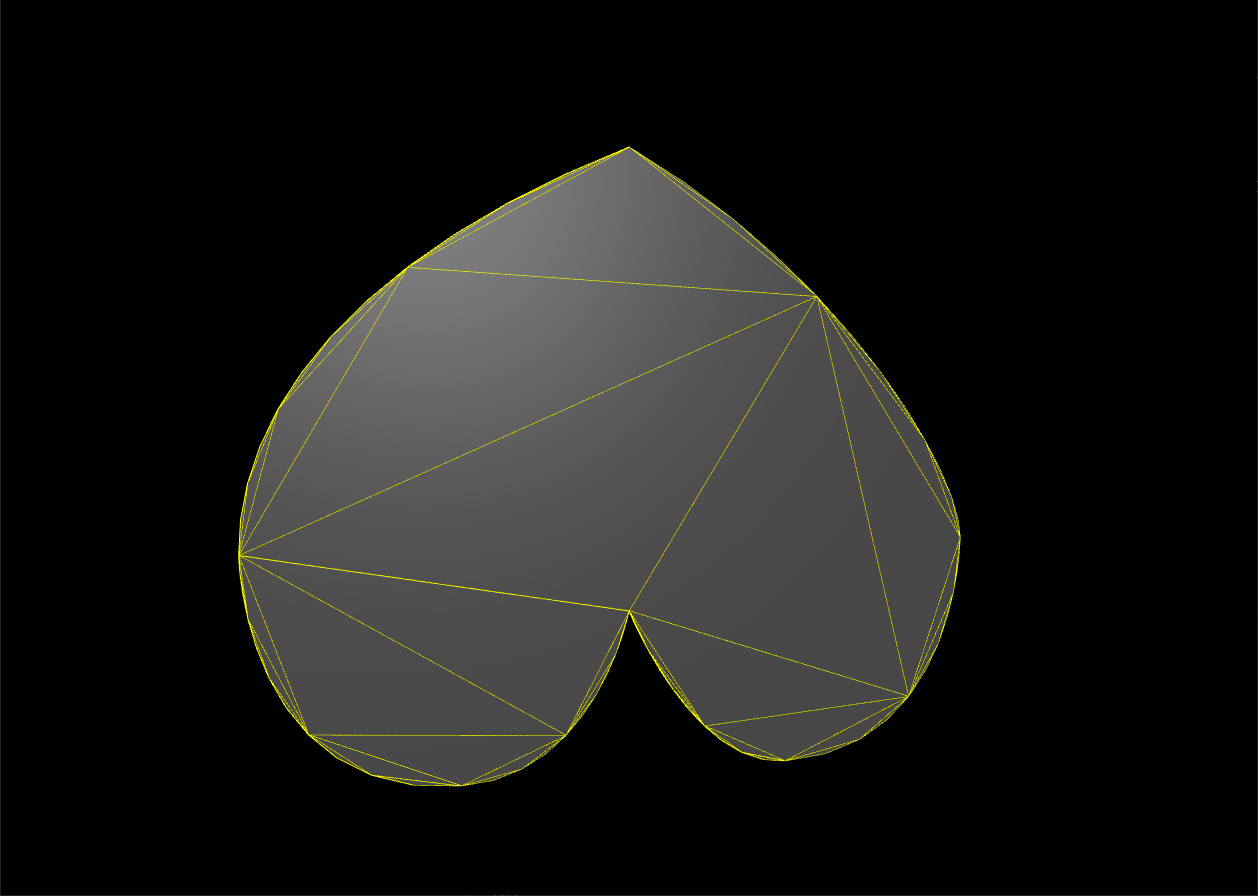
이렇게 생성한 모양을 참조하여 Mesh를 만드는 게 ShapeGeometry 이다.
현재 Mesh의 크기가 너무 커 로드될 때마다 마우스 휠로 화면을 축소시키고 있는데
이러한 번거로움을 덜기 위해 _setupCamera 함수 내부에서 camera의 z 위치를 변경해보자.
camera.position.z = 15;
2. TubeGeometry
TubeGeometry는 참조한 곡선을 따라 원통이 이어지는 형태를 가진 Geometry 이다.
TubeGeometry를 이해하기 위해서는 먼저 곡선을 정의할 수 있는 Curve CLASS 를 파악해야 한다.
(1) Curve
위에서 작성했던 _setupModel 함수를 주석처리하고 새로운 _setupModel을 작성해보자.
_setupModel() {
  class CustomSinCurve extends THREE.Curve {
    constructor(scale) {
      super();
      this.scale = scale;
    }
    getPoint(t) {
      const tx = t * 3 - 1.5;
      const ty = Math.sin(2 * Math.PI * t);
      const tz = 0;
      return new THREE.Vector3(tx, ty, tz).multiplyScalar(this.scale);
    }
  }
  const path = new CustomSinCurve(4);

  const geometry = new THREE.BufferGeometry();
  const points = path.getPoints();
  geometry.setFromPoints(points);

  const material = new THREE.LineBasicMaterial({color: 0xffff00});
  const line = new THREE.Line(geometry, material);

  this._scene.add(line);
}
코드를 보면 Curve CLASS를 상속받아 CustomSinCurve CLASS를 새롭게 정의하고 있고
CustomSinCurve CLASS는 Curve를 t 매개변수 방정식으로 정의한다.
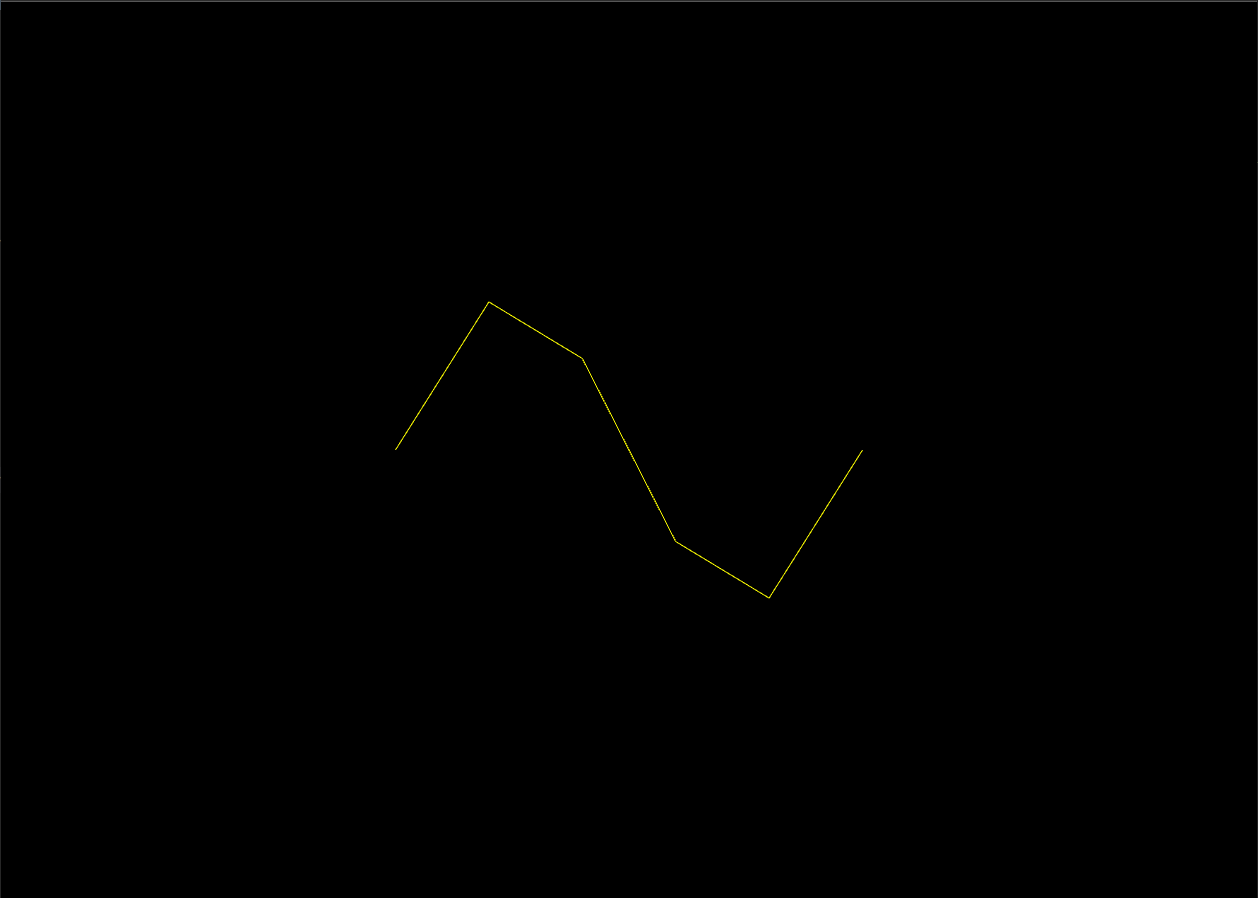
getPoint 메소드를 통해 0과 1 사이의 t 값에 대한 Curve의 구성 좌표 를 계산할 수 있다.
현재 Curve가 각져있는 상황인데 좀 더 부드러운 곡선을 그리고 싶다면 CustomSinCurve CLASS의 getPoints 메소드 인자에 정수값을 지정하면 된다.
이 값은 기본값이 5인데 이를 30으로 변경해보자.
const points = path.getPoints(30);getPoints는 Curve를 구성하는 좌표의 개수 를 의미하므로 값이 클수록 부드러운 곡선 을 보여주게 되는 것이다.
(2) TubeGeometry
새롭게 정의했던 _setupModel 함수를 주석처리하고 이전에 주석처리했던 기존 setupModel 함수의 주석을 해제하자.
앞서 ShapeGeometry에 대해 정의한 부분은 주석처리하고 TubeGeometry에 대한 코드를 작성해보자.
// ShapeGeometry
_setupModel() {
  class CustomSinCurve extends THREE.Curve {
    constructor(scale) {
      super();
      this.scale = scale;
    }
    getPoint(t) {
      const tx = t * 3 - 1.5;
      const ty = Math.sin(2 * Math.PI * t);
      const tz = 0;
      return new THREE.Vector3(tx, ty, tz).multiplyScalar(this.scale);
    }
  }
  const path = new CustomSinCurve(4);
  const geometry = new THREE.TubeGeometry(path);

  const fillMaterial = new THREE.MeshPhongMaterial({color: 0x515151});
  const cube = new THREE.Mesh(geometry, fillMaterial);

  const lineMaterial = new THREE.LineBasicMaterial({color: 0xffff00});
  const line = new THREE.LineSegments(
    new THREE.WireframeGeometry(geometry), lineMaterial);

  const group = new THREE.Group()
  group.add(cube);
  group.add(line);

  this._scene.add(group);
  this._cube = group;
}
Tube가 이어지는 형태를 결정하기 위해 Curve 객체를 path라는 이름으로 생성하고 이를 TubeGeometry에 인자로 연결한다.
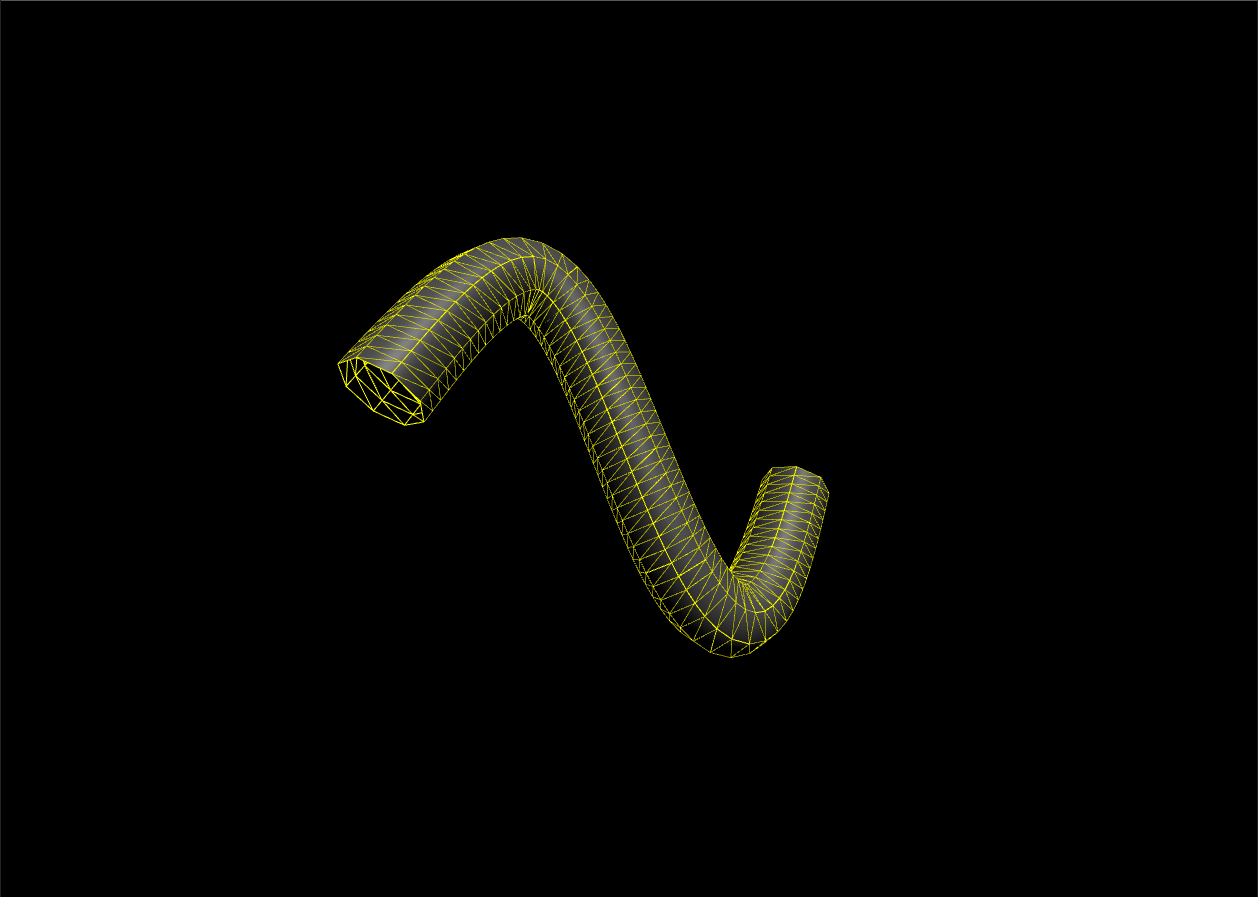
TubeGeometry는 path 인자 외에도 아래와 같은 4개의 추가 인자를 받는다.
- path
Tube가 이어지는 형태를 결정하는 경로다.
- tubularSegments
Tube의 진행 방향에 대한 분할 개수이며 기본값은 64이다.
- radius
Tube의 원통에 대한 반지름 크기를 정의하며 기본값은 1이다.
- radialSegments
원통에 대한 분할 개수를 정의하며 기본값은 8이다.
- closed
원통의 끝단을 닫을지에 대한 여부를 정의하며 기본값은 false이기에 열려있다.
3. LatheGeometry
선을 y축으로 회전하여 생성하는 3차원 Mesh 이다.
LatheGeometry를 정의하기 위해 먼저 회전시킬 선을 생성해야 한다.
기존 _setupModel 코드 내부를 추석처리하고 다음을 작성하자.
const points = [];
for(let i = 0; i < 10; ++i) {
  points.push(new THREE.Vector2(Math.sin(i * 0.2) * 3 + 3, (i - 5) * 0.8));
}

const geometry = new THREE.BufferGeometry();
geometry.setFromPoints(points);

const material = new THREE.LineBasicMaterial({color: 0xffff00});
const line = new THREE.Line(geometry, material);

this._scene.add(line);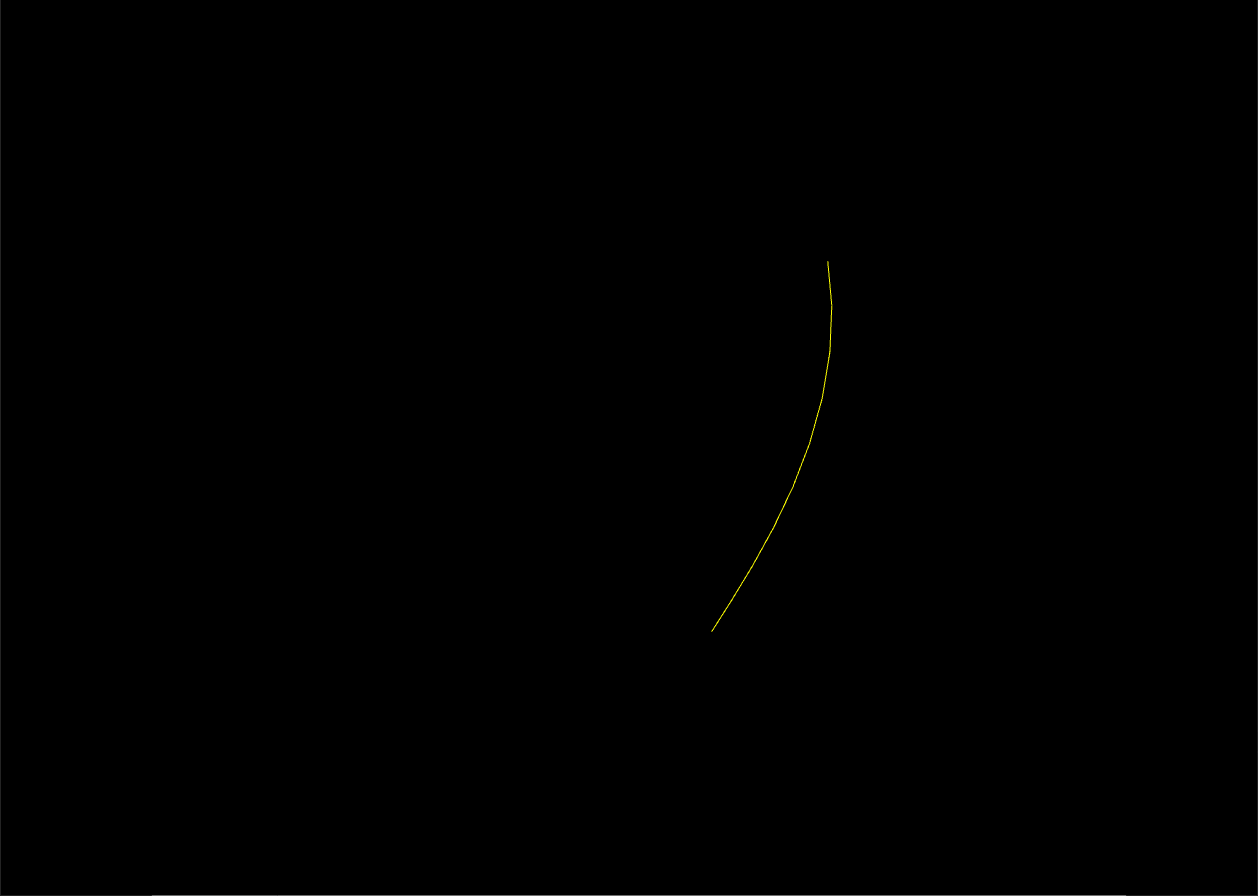
이렇게 생성한 선을 회전시키기 위해 LatheGeometry에 지정을 해줄텐데
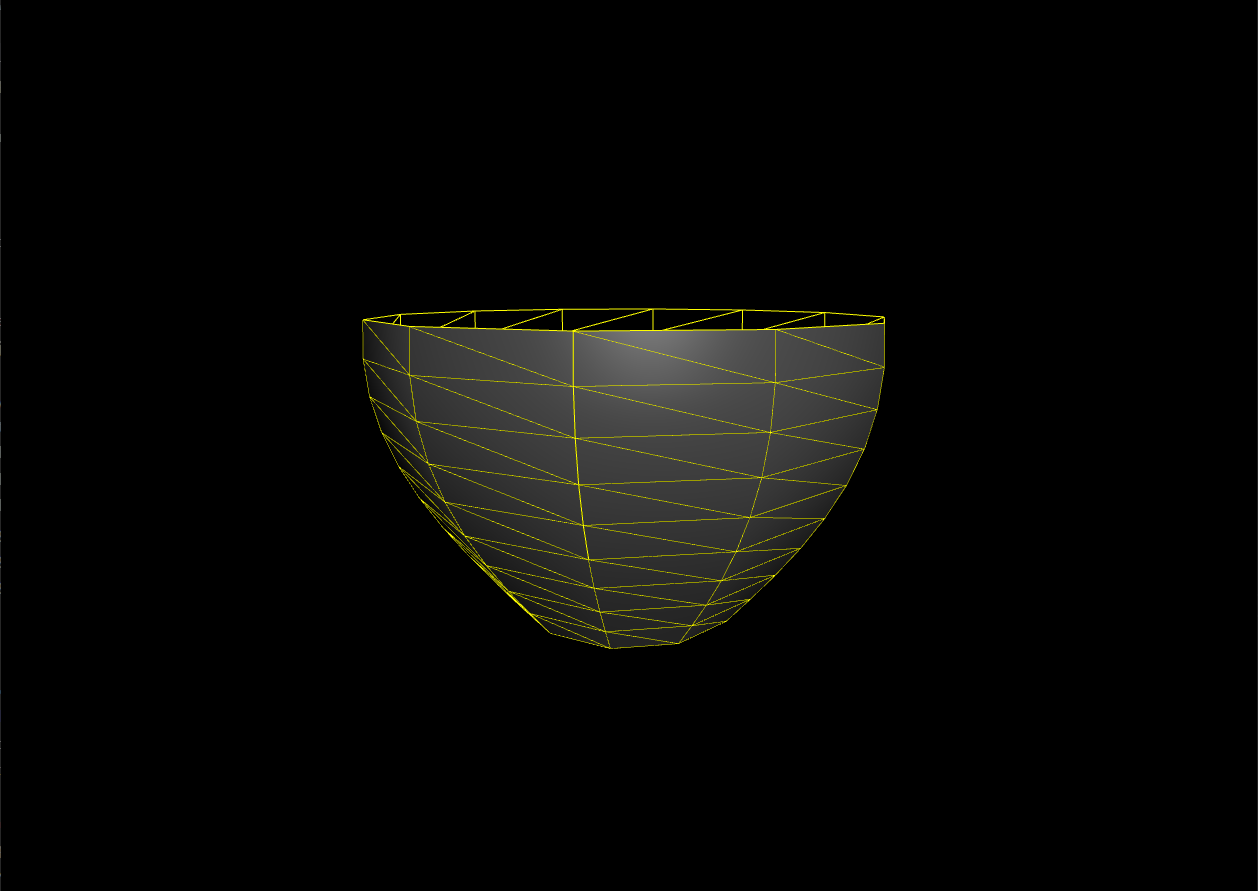
for 반복문 밑으로는 다 주석처리하고 다음과 같이 작성해보자.
_setupModel() {
  const points = [];
  for(let i = 0; i < 10; ++i) {
    points.push(new THREE.Vector2(Math.sin(i * 0.2) * 3 + 3, (i - 5) * 0.8));
  }

  const geometry = new THREE.LatheGeometry(points);

  // ------------------------------------default--------------------------------------
  const fillMaterial = new THREE.MeshPhongMaterial({color: 0x515151});
  const cube = new THREE.Mesh(geometry, fillMaterial);

  const lineMaterial = new THREE.LineBasicMaterial({color: 0xffff00});
  const line = new THREE.LineSegments(
    new THREE.WireframeGeometry(geometry), lineMaterial);

  const group = new THREE.Group()
  group.add(cube);
  group.add(line);

  this._scene.add(group);
  this._cube = group;
}
그럼 예상했듯이 생성한 선을 한바퀴 돌려 3차원 Mesh가 만들어진 결과를 확인할 수 있다.
LatheGeometry는 인자로 points 외에도 아래와 같은 3개의 추가인자를 받는다.
- points
3차원 Mesh를 만들기 위해 회전시킬 기준 선이다.
- segments
분할 개수를 정의하며 기본값은 12이다.
- phiStart
시작 각도를 정의하며 기본값은 0이다.
- phiLength
연장 각도를 정의하며 기본값은 2pi(360도)이다.
4. ExtrudeGeometry
평면 shape에 깊이값을 부여해주고 Mesh의 윗면과 밑면을 비스듬하게 처리해주는 Geometry이다.
이렇게 비스듬하게 처리해주는 것을 Beveling이라고 한다.
앞서 작성한 아래 부분은 주석처리하고
// const points = [];
// for(let i = 0; i < 10; ++i) {
//   points.push(new THREE.Vector2(Math.sin(i * 0.2) * 3 + 3, (i - 5) * 0.8));
// }

// const geometry = new THREE.LatheGeometry(points);
위에서 작성했던 하트 모양의 shape을 가져와 다음과 같이 작성하자.
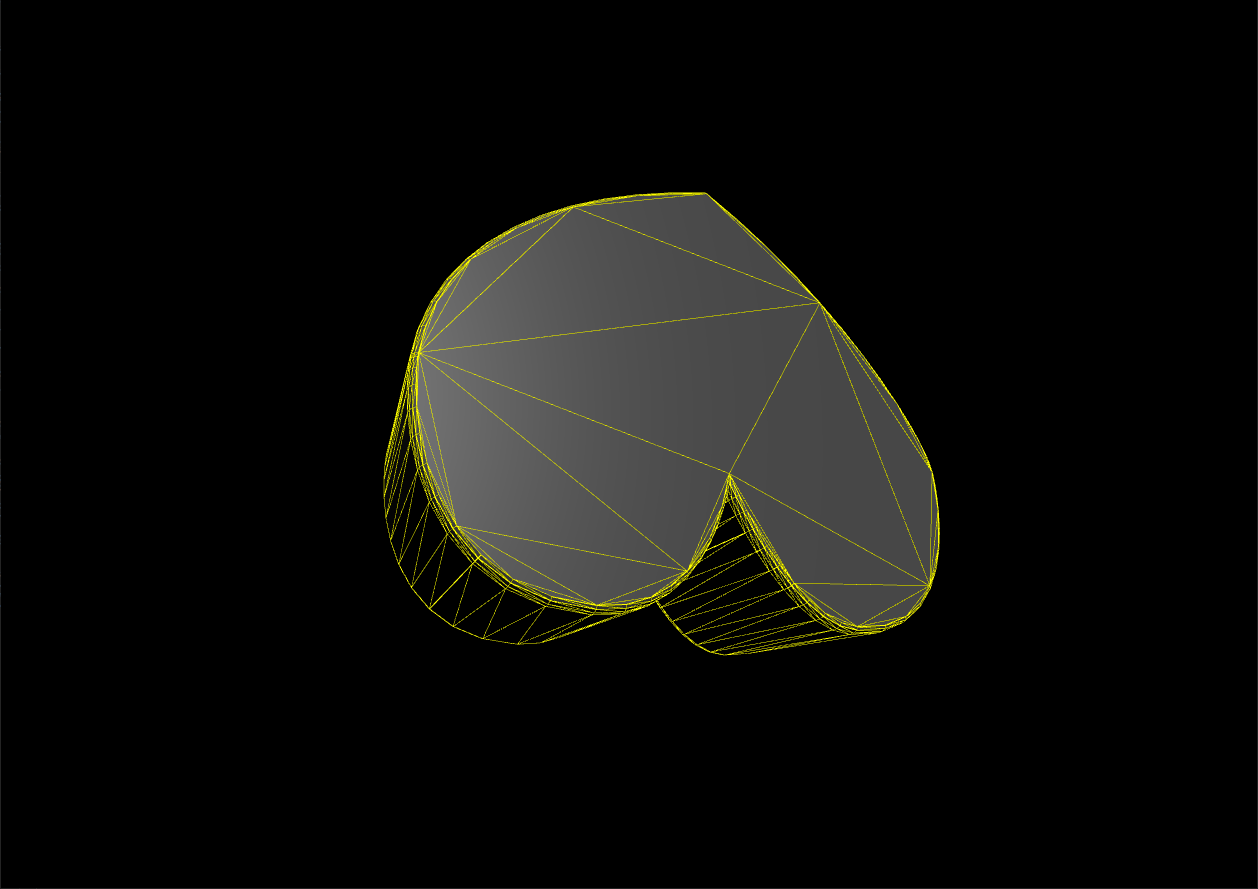
const shape = new THREE.Shape();
const x = -2.5, y = -5;

shape.moveTo(x + 2.5, y + 2.5);
shape.bezierCurveTo(x + 2.5, y + 2.5, x + 2, y, x, y);
shape.bezierCurveTo(x - 3, y, x - 3, y + 3.5, x - 3, y + 3.5);
shape.bezierCurveTo(x - 3, y + 5.5, x - 1.5, y + 7.7, x + 2.5, y + 9.5);
shape.bezierCurveTo(x + 6, y + 7.7, x + 8, y + 4.5, x + 8, y + 3.5);
shape.bezierCurveTo(x + 8, y + 3.5, x + 8, y, x + 5, y);
shape.bezierCurveTo(x + 3.5, y, x + 2.5, y + 2.5, x + 2.5, y + 2.5);

const settings = {
  steps: 1,
  depth: 4,
  bavelEnabled:false,
  bavelThickness: 0.1,
  bavelSize: 0.1,
  bavelSegments: 1
}

const geometry = new THREE.ExtrudeGeometry(shape, settings);
settings 는 ExtrudeGeometry를 생성할 때 지정하는 설정값 이다.
ExtrudeGeometry 객체를 생성할 때에는 shape과 settings 객체를 넘겨준다.
실행해보면 아래와 같은 결과가 나온다.
그럼 이제 settings에 들어가는 변수들에 대해 파악하기 위해 설명과 함께 다양하게 변경해볼텐데
효과적으로 파악하기 위해 camera의 위치를 다음과 같이 추가해보자.
camera.position.x = -15;이제 본격적으로 settings를 알아보자.
- steps
깊이 방향으로의 분할 개수를 정의하며 기본값은 1이다.
- depth
깊이값을 정의하며 기본값은 100이다.
- bavelEnabled
Beveling 처리 여부에 대해 정의하며 기본값은 true이다.
- bavelThickness
Beveling에 대한 두께값을 정의하며 기본값은 6이다.
- bavelSize
shape의 외곽선으로부터 얼마나 멀리 Beveling할 것인지의 거리에 대해 정의하며 기본값은 2이다.
- bavelSegments
Beveling 단계수를 정의하며 기본값은 3이다.
5. TextGeometry
ExtrudeGeometry의 파생 CLASS이다.
TextGeometry는 폰트 데이터가 필요한데 TTF와 같은 폰트 파일을 three.js에서 사용할 수 있는 포맷으로 변경해 사용한다.
일단 지금은 제공되는 json 폰트 파일을 사용해볼텐데
폰트를 로드하기 위해서는 FontLoader CLASS가 필요하다.
CLASS를 사용하기 위해 02_basic.js 파일의 최상단에서 아래와 같이 import해보자.
import { FontLoader } from "../examples/jsm/loaders/FontLoader.js"
import { TextGeometry } from "../examples/jsm/geometries/TextGeometry.js"
그리고 _setupModel 함수를 다음과 같이 작성하는데 기존에 작성했던 Material 부분도 loadFont 비동기 함수 부분 안으로 이동시켜 연결될 수 있도록 한다.
const fontLoader = new FontLoader();
async function loadFont(that){
  const url = "../examples/fonts/helvetiker_regular.typeface.json";
  const font = await new Promise((resolve, reject) => {
    fontLoader.load(url, resolve, undefined, reject);
  });
  const geometry = new TextGeometry("GIS", {
    font: font,
    size: 5,
    height: 1.5,
    curveSegments: 4,
    bavelEnabled:true,
    bavelThickness: 0.7,
    bavelSize: .7,
    bavelSegments: 2
  });
  // ------------------------------------default--------------------------------------
  const fillMaterial = new THREE.MeshPhongMaterial({color: 0x515151});
  const cube = new THREE.Mesh(geometry, fillMaterial);

  const lineMaterial = new THREE.LineBasicMaterial({color: 0xffff00});
  const line = new THREE.LineSegments(
    new THREE.WireframeGeometry(geometry), lineMaterial);

  const group = new THREE.Group()
  group.add(cube);
  group.add(line);

  that._scene.add(group);
  that._cube = group;
};
loadFont(this);
TextGeometry는 3차원 Mesh로 생성할 문자열을 첫번째 인자로 받는다.
두번째 인자로는 ExtrudeGeometry와 비슷하게 settings값을 받는데
size는 글자의 크기를 정의하고
height는 깊이값을 정의하며 기본값은 50이다.
curveSegments는 하나의 Curve를 구성하는 정점의 개수를 정의하며 기본값은 12이다.
이렇게 Three.js에서 제공하는 기본 Geometry들에 대해 알아보고 인자값을 다양하게 지정함으로써 익혀봤다.
다음 시간에는 씬그래프(Scene Graph)를 이용한 공간구성에 대해 알아볼까 한다.
[Three.js module 활용 - (3) Geometry 마무리 전체 코드]
GitHub - rlacodud/UID
Contribute to rlacodud/UID development by creating an account on GitHub.
github.com
'Three.js' 카테고리의 다른 글
Three.js module 활용 - (5) Material (1) 2022.09.26 Three.js module 활용 - (4) Scene Graph (0) 2022.09.26 Three.js module 활용 - (2) Geometry (1) 2022.09.26 Three.js module 활용 - (1) Basic (0) 2022.09.26 Three.js 입문기 (1) 2022.09.26